
Airbrush Air Sources
The airbrush itself is only one half of the painting solution. The other half is the air source. This could be a simple disposable air can, or an air compressor with all the bells and whistles, or something in-between.
Air Can - Many people start their airbrush experience with an air can. This may be fine for your first time. The can seems cheaper initially (maybe $5 versus $100 for a compressor), but in the long run it will get very expensive. A can contains only about 10 continuous minutes of air. For me, I'm just getting warmed up after 10 min, still on the primer coats.
It can be frustrating to have the air pressure peter out to zero when you're in the middle of a paint coat. Besides the limited air volume, there is also no control over air pressure (although I have heard that regulators are available for these cans), again limiting your control over the process.
I've also found that a lot of moisture condenses on the outside of the cans which get fairly cold during the process. Keep that moisture away from your paint job, it could ruin it. IMO, once you get into airbrushing you will love it, and the cost and inconvenience of replacement cans, plus their lack of control, will have you looking for another solution.
Tank - Another option is a large air tank. There are gas cylinders and propane-style storage tanks. Some people use a car tire. You will need to figure out adapters and regulators.
The advantage of these solutions is that the air will last longer than a can. However, they will also eventually run out and you will need a way to refill them. Even filling tires is not free anymore,
it's usually 25 cents or so to run the compressor at a gas station.
Compressors - These are generally the best solution, despite higher initial cost. However, there are many types of compressors, so you will need to know what to look for.
Compressors use an electric motor and a piston or diaphragm to compress the air. The better compressors are coupled with a storage tank. The advantage of the tank is that the compressor does not need to run all the time.
This is great for two reasons: 1) less noise and (2) the piston or diaphragm causes the air supply to "pulse" which is effectively removed by buffer action of the tank. (The pulsing effect can actually be seen in the paint job if you are trying to spray fine lines).
You'll find quiet table-top compressors that are designed for nail work or cake decorating. However, these have a pulsing air supply. There are also compressors "designed for" airbrushing; these are generally small, have no regulators, and have no tank (again, pulsing air).
My favorite solution is a smaller "workshop" compressor for air-powered tools, available at your home improvement store (see example below).
These have a tank, built in pressure regulators, and a nice long coiled hose. Take your airbrush with you when you purchase this, so you can fit and buy hose adapters as well.
This particular model holds 3 gallon, and is spec'd at 0.7 CFM (cubic feet per minute) and 120 psi.
Once the tank is filled, I can spray for about 20-30 min at 15-20 psi before the compressor turns on again. It's not incredibly quiet but is really no louder than some of my household appliances (e.g. dishwasher; but would probably not use it indoors at night with family sleeping). The price point is about $100.
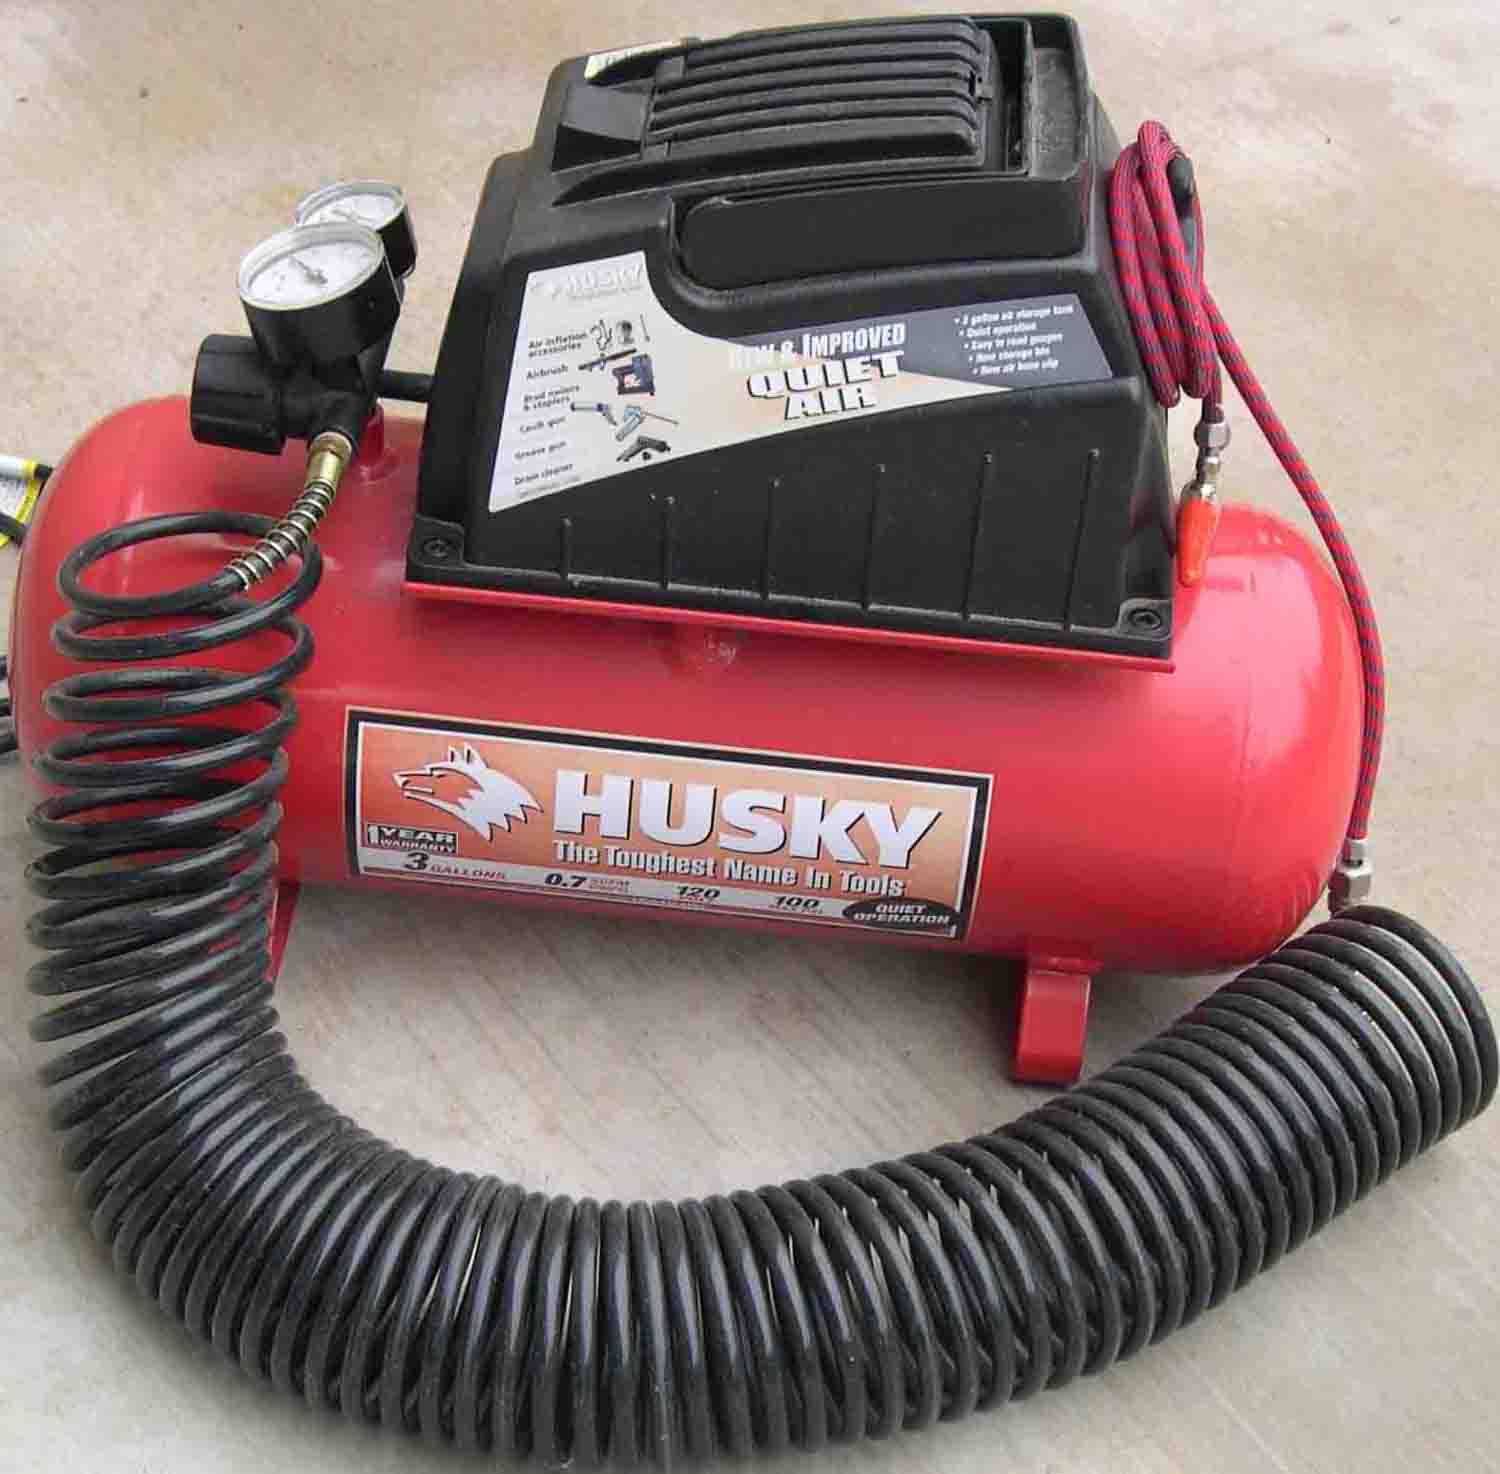
Workshop Compressor. Motor housed in black box sits on top of red metal air tank. Note the Pressure Gauge and Regulator (round dials on left side).
Being able to dial the pressure in with your regulator adds enormous flexibility to the airbrushing process.
During airbrushing, moisture from the air tends to condense in the system, and can find its way onto your paintjob masterpiece-in-progress.
As cheap insurance, purchase one or more moisture traps from your airbrush supplier, and install between the compressor and the airbrush.