
Applying Plastic Covering Trim Designs
Iron-on plastic coverings such as Monokote, Ultracote, or Solite can make fast work of finishing an RC airplane model.If you've not already seen our tutorial on Heat Shrink Plastic Film Coverings, be sure to check it out. Once you've mastered the art of applying one color of film, you will next want to know how to do multi-color trim designs, and this photo lesson will help you understand how. Accent trim on your airplane is a good idea, because (a) it looks neater, and (b) the plane becomes more visible from the ground.
If a plane is covered in a single color, it can be hard to tell its orientation at altitude. I (and many others!) have lost planes to crashes for this very reason. Some color schemes to stay away from: all blue, all black, all silver, all transparent of any color.
Some color schemes that tend to very visible: yellow with black trim, orange and white, red and white, red-white-blue. It's best to color the top and bottom of the wings differently: dark on bottom and light on top emphasizes the natural contrast of the sun overhead.
Large circles or stripes of contrasting color on the wing bottom are also a great help to your eyes. Diagonal stripes on the top of the wing can help during landing, as it's easier to tell if the wings are level.
The covering material itself can be used for trim. Some manufacturers make trim colors in strips of material designed just for that purpose. These have a sticky-back to them, i.e. they need not be heated to apply. These are known as peel-and-stick for obvious reasons.
Their convenience is somewhat offset by being thicker and heavier, and having a smaller range of colors to choose from. They are hard to reposition once applied, so line up the trim piece carefully.
The soap and water method will make your life much easier here. Add a drop or two of dishwashing liquid to a cup of water and stir. Apply to the area where the trim will go, mopping up the excess with a paper towel. Then place the trim onto the area; you will notice that it can now float around on the soapy water. Use an old credit card or similar to squeegee the excess water out from under the trim. Blot dry with the paper towel and leave overnight to dry.
Use a metal edge ruler and a razor or X-acto to cut out the trim piece. A newspaper section can be used as a cutting backing on your worktable. Wipe the edges of the trim piece with clean fingers to remove any cutting debris. Also make sure that the airplane part to be trimmed is clean and dry.
As a general rule, try to avoid film-on-film trim schemes. It is challenging (though not impossible, we will discuss how below) to iron large pieces of film on top of a base color film, without getting wrinkles.
Sometimes lots of small wrinkles, which of course are highlighted by your nice shiny covering material. Think about your trim scheme before doing the base covering. It helps to take a 3 view of the airplane (sketch one or photocopy from the plans), make multiple copies for color designs.
Use colored pens or makers to sketch out the color scheme. You can make your airplane very colorful by using the structure itself for color lines. For example, make control surfaces (ailerons, rudder or elevator) a different color. Make top and bottom of the wing and fuselage in different colors.
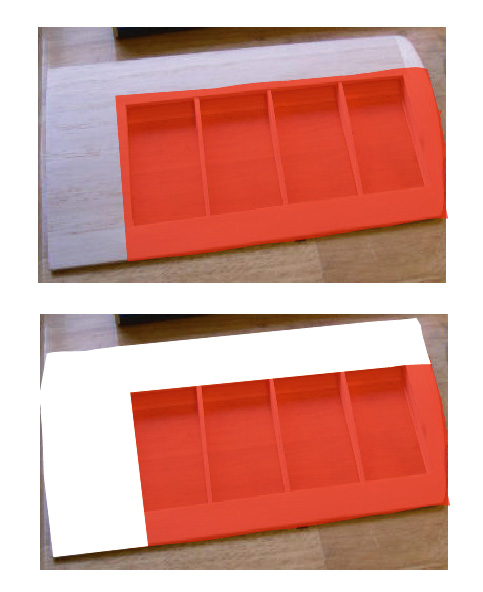
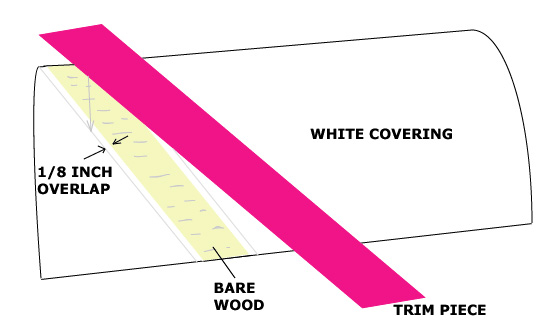
You can also make use of overlap techniques to add trim. On the open frame wing below, covering is first added over the open part. A transparent color was used to highlight the wood structure. Then an overlapping solid color used on the rest of the wing section. Make the overlaps at least 1/8 inch, and make sure the overlap line is fully sealed before attempting to shrink the covering.
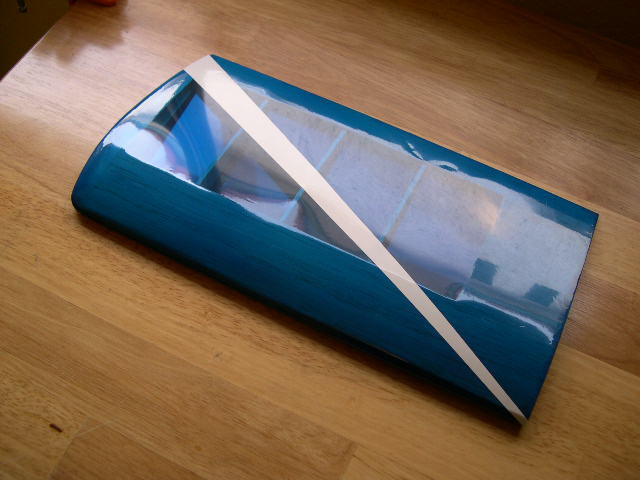
Overlaps can also be used to good effect on solid structures. Use a soft pencil and rulers to lay out the scheme on wood. Again, plan for 1/8 overlap. Iron down lighter colors before dark, transparents before solids. Otherwise the darker color will partially show through the light at the seam area. Below is an example of a fully sheeted wooden wing being covered with this method:
Now let's assume that you cannot avoid the use of film-on-film for trim. You forgot to design trim into your color scheme, or you find that your rc airplane is just not visible enough, or you just want to go wild with your plane's appearance! Here's how to iron film trim onto a film-covered airplane.
Make sure that the covering iron is on a low heat setting.
Start with a setting that is actually a bit lower that you used for tacking the base film to the wood. You can always turn the heat up if necessary, but low heat tends to help prevent bubbles.
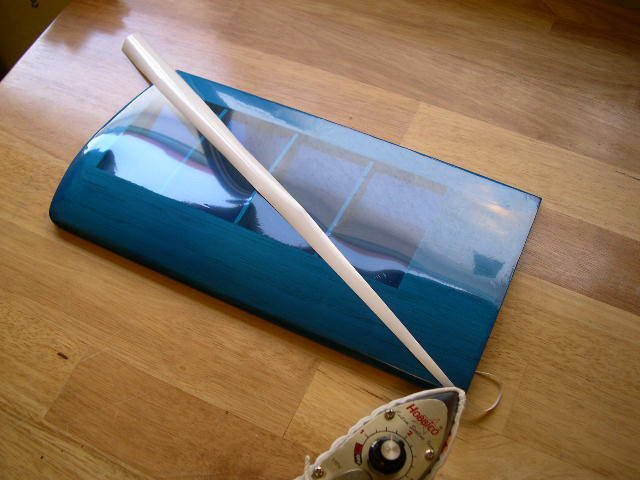
Make sure that the trim piece and the piece to be covered are dust-free. The covering must already be shrunk tight on the base piece. Remove the backing from the trim and tack one corner of it down.
Then smooth out the trim piece, making sure the alignment relative to the surface is good. Now hold the far end of the piece up from the surface, just a few inches.
Extend it gently along its length.
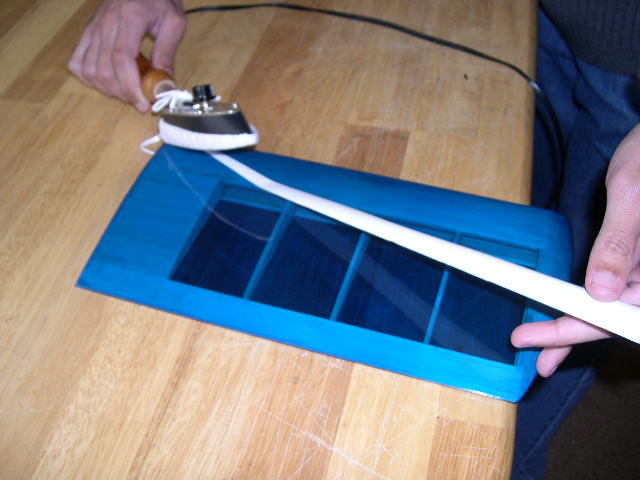
Using the broad back part of the iron, start ironing down the trim, a few centimeters at a time. Keeping the trim raised off the surface will help reduce bubble formation.
If you see any bubbles, stop, reheat, lift, try again. It will be more difficult to remove bubbles if you wait till the piece is completely ironed down. In this case, we made it all the way without any bubbles: slow and easy is key. Cut away excess film as needed.
Click on the thumbnails below for larger images:
Now that looks nice and neat. Repeat as desired!