
Scale Models - Decals and Markings
On scale airplanes, decals and markings add individual character to the airplane. Carefully applied decals can make your rc airplane a show-stopper.
Surface Preparation is the key to good decal application. The surface needs to be smooth and clean. Hopefully you've created a smooth surface on your way to a good paint job. Clean the surface with a damp cloth.
Decals are best applied to a glossy surface. A glossy surface reduces the phenomenon known as "silvering", meaning that your plastic film markings look like stuck-on plastic.
This happens when the surface below the plastic is rough, scattering light in many directions through the plastic, increasing its visibility.If your paint top coat is not already glossy, apply a clear gloss overcoat.
This can be acrylic, enamel or lacquer, depending on your paint type. Another good all-purpose clear coat is Future floor wax.
This can be airbrushed straight from the bottle.
To reduce silvering even more, remove all excess film from around the marking, with a sharp x-acto knife.
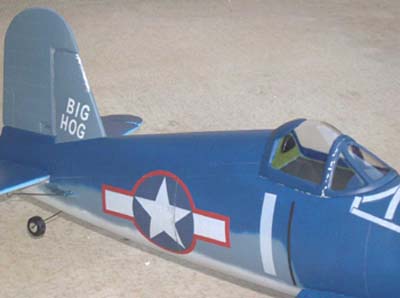
This can be tedious, especially for small letters and numbers (see the "Big Hog" in the photo below), but the "painted-on" effect is worth it.
There are two categories of decals that you will be likely to come across: Peel-and-stick or Water-slide.
For peel-and-stick decals, I've found that the soap and water method works really well.
Put 2-3 drops of dishwashing liquid in a cup of water. Mix gently, try to not create lots of bubbles/foam.
Then apply with a non-lint cloth or brush to the target area (which should be clean). Peel the backing off and float the decal onto the liquid. Once in position, press down gently from the center outwards.
Use a soft cloth or similar to squeegee excess liquid out from under the sticker. Let dry overnight, then wipe away excess soap residue with a damp cloth.
Seal with clear gloss in preparation for weathering.
For water-slide decals, the procedure is very
different.
These decals have a water-activated adhesive, and can be more tricky to apply. The benefit is that these can be very thin, giving them a realistic look closer to that of painted markings.
To apply, cut a single decal from the sheet with scissors. Using tweezers, dip it into room-temperature water in a cup or bowl, for about 10 seconds. Then rest on a paper towel for another 20-30 seconds.
Now place the decal over the model, and gently slide it off the backing paper and into position. Once in position, press down gently from the center outwards. Use a soft cloth or similar to squeegee excess liquid out from under the sticker.
Let dry overnight, then wipe away water residue with a damp cloth. Seal with clear gloss in preparation for weathering.There are couple of special liquids that can help with water-slide decal application.
The first is Micro-Set. Apply some of this to the model before sliding the decal on. It will help with positioning and securing the decal.
The other solution is Micro-Sol. This is used after the decal is dry, and is brushed on top of it.
Micro-Sol contains "plasticizers" that actually soften the plastic temporarily, allowing it to stretch and conform to surface detail. The decal will wrinkle right after using this stuff, but don't touch it, have patience and let it do its job.
Sometimes the markings that you want to use for a specific example of a full-scale airplane are not included in the kit or are not available for sale. In that case, you can make your own decals.